It's been a while since my last hardware project so I decided with the new games room in Shopify's Ottawa office that I would build a retro-gaming themed box to switch between the consoles we have hooked up to the TV. When equipping the room, I specifically picked the LG 60LB6500 because it had RS232 control with a 3.5mm TRS jack. I later learned that all LG TVs support RS232 either through a DB9 port, 3.5mm TRS, or via USB serial adapter; however, the USB serial adapter cannot turn the TV on because the USB port does not provide power if the TV is off.
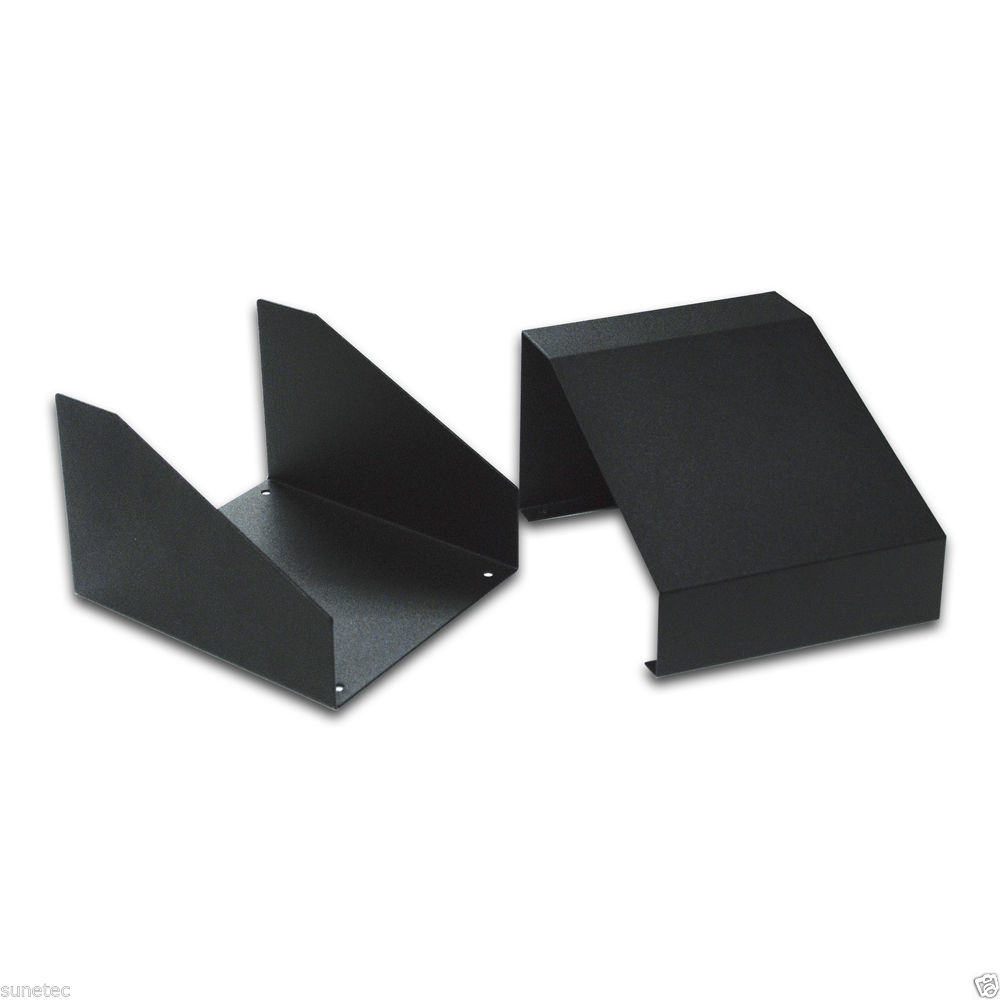
The first piece I wanted to find was an enclosure as it is the most important part of this project because I had a very specific design in mind. After searching eBay on and off for a week, I finally found one that was exactly what I wanted: short but wide with a sloped front for the buttons so you can easily press them.
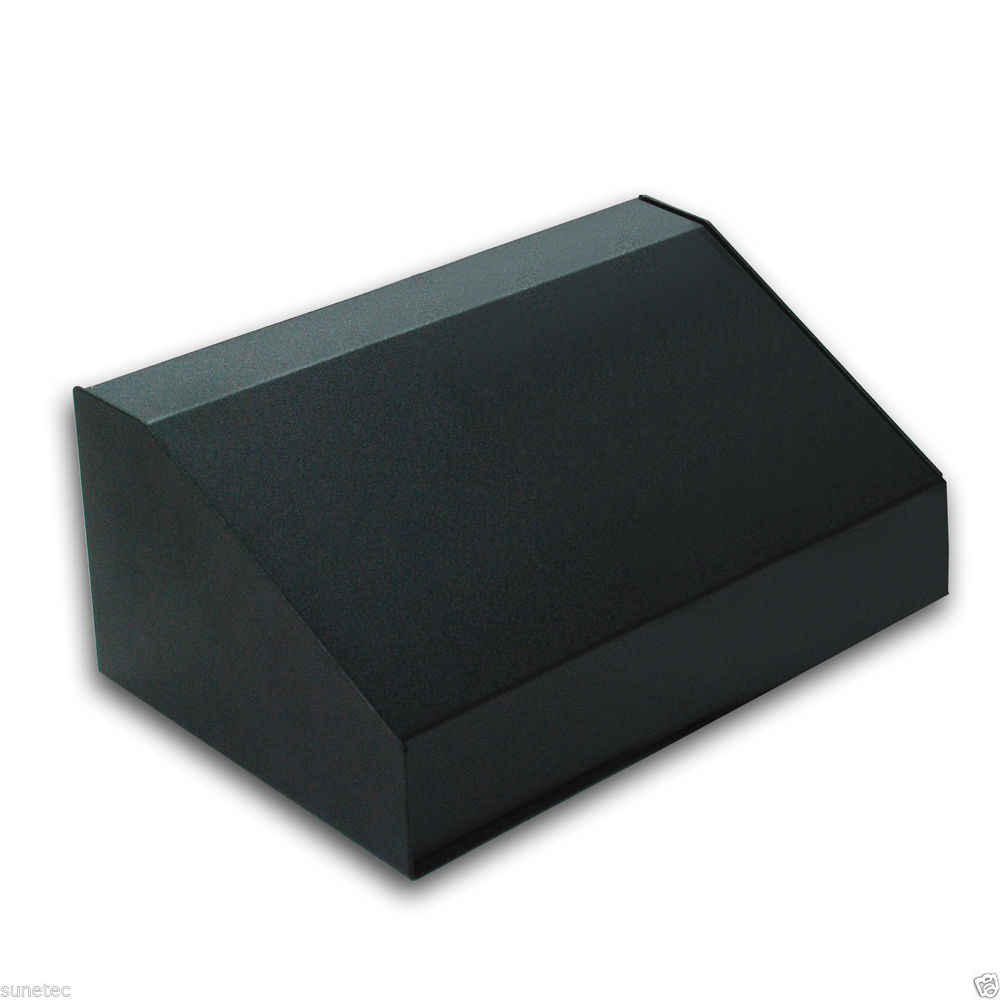 Enclosure
Next was to find buttons that I liked. The first ones that I liked were from Adafruit but they were a bit on the small side at 16mm in diameter and they were only available in 4 colours: blue, green, red, white. I really wanted unique colours for 5 buttons: power, Xbox, PlayStation, Wii, and Composite. I continued my search and eventually I found the anti-vandal line of switches from E-Switch. They looked very much like the switches from Adafruit, so much so I believe the ones from Adafruit are actually Chinese knock-offs given their cheap price and from identical ones I've seen on AliExpress. Their PV7, PV8, and PV9 lines looked the most promising as they were large and had 6 colours. It was harder than I thought finding a distributor that actually supplied all 6 colours: blue, green, red, yellow, white (as well as orange). Eventually I found Straight Road Electronics. They carry the white, red, orange, green, blue, yellow switches that I wanted. The switches are definitely on the pricey side at $22 each.
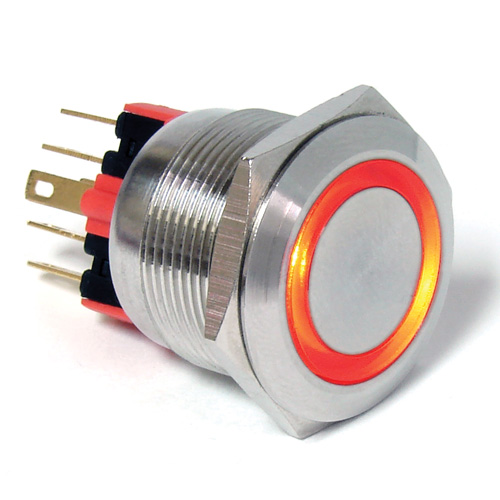 PV7 Switch
With the buttons picked it was time to move onto the design. Based on the measurements I started on the sloped part that would lay out the 5 buttons and volume knob. I'm using QCAD (well worth the £33 for the pro version). After a bajillion (actually like 40-50) iterations this is the design I've settled on:
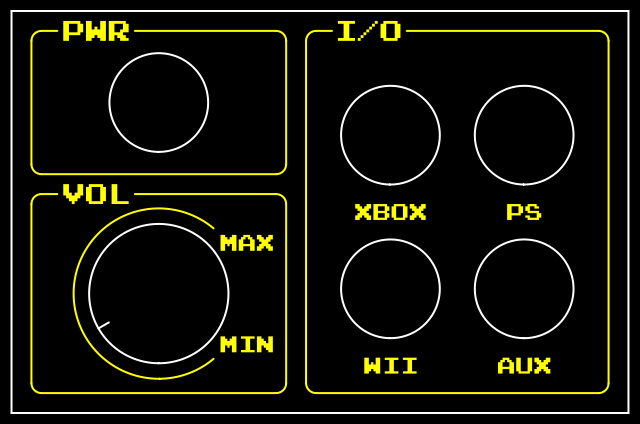 Sloped
My plan is to find a company in Ottawa that can laser cut and etch the aluminum case otherwise I will use the Epilog Mini 24 at the Ottawa Imagine Space and drill the holes myself. The back of the case needs to be laser cut and etched as well for the power and 3.5mm TRS jacks. I also decided to laser etch the front which means I had to come up with a name. Tom suggested CNSL and I added SWTCR to make CNSL SWTCR. The name has grown on me. What has also grown on me is the yellow colour in the drawing. The final look definitely needs to include the yellow colour. Normally laser etched aluminum will keep its natural (or regain in this case) look but you can fill the grove left with paint and then wipe away the extra. Watch this video if you are curious.
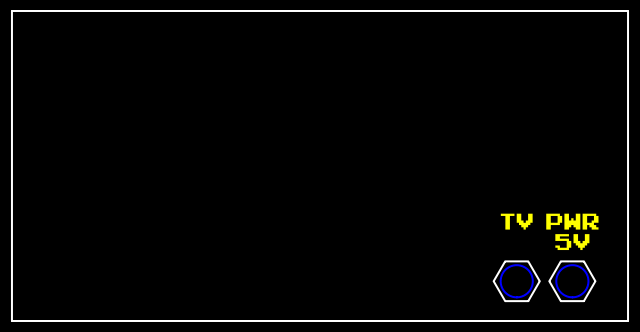 Rear[/caption]
 Front
Front
While designing the layouts I was also trying to find the perfect volume knob. I've ordered a few because there are a lot of different designs but my current favourite is simple with just a notch as the indicator and a reasonably large diameter of 35mm. It looks like the top is a different colour but the whole thing is black which matches the enclosure.
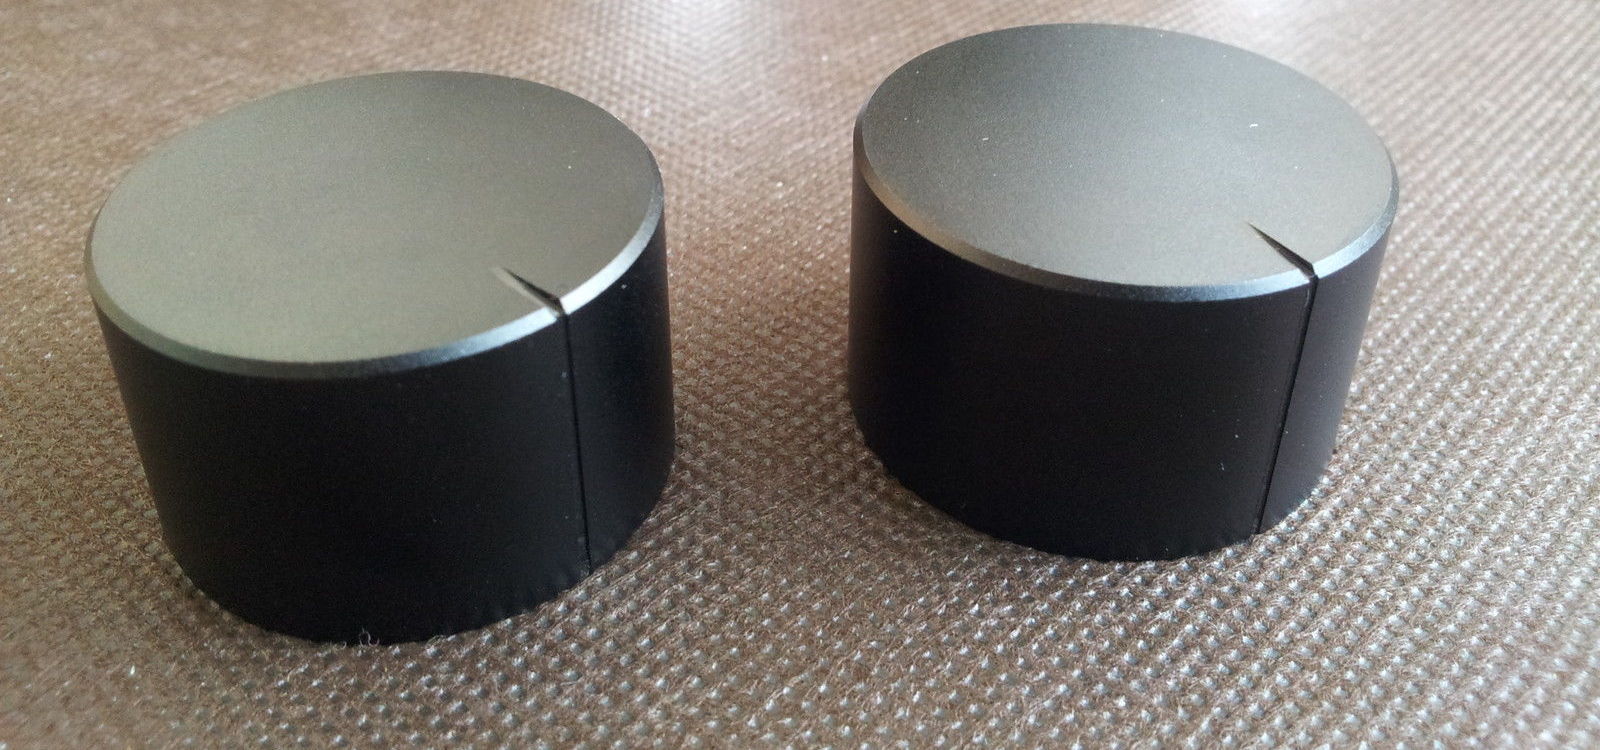 Volume Knob
And for the brains, my microcontroller of choice is the Teensy. It's faster than an Arduino with more inputs and outputs. Combining the Teensy with a Darlington Transistor Array and a TTL to RS232 transceiver is all of the electronics needed to connect the switches, potentiometer, switch LEDs, and the TV. It took me longer to find the term "transistor array" than I'm willing to admit but I did find it and it will be very useful for handling turning on up to 7 LEDs in a compact DIP package that will fit easily on the prototype board I picked.
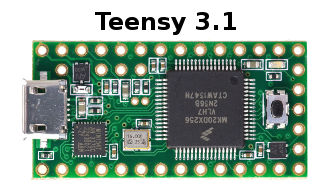
I've previously used the Teensy for 2 hardware projects (USB emergency stop button and traffic lights for stairs) and highly recommend it.
With all the parts ordered all I can do now is wait for them to come from around the world and tweak the design while trying to find someone to help laser cut and etch my design onto the unique shape of the case. I plan on taking lots of photographs during and documenting the build process for anyone to reproduce on their own.